Cooking ham without a thermometer can feel tricky, but it doesn’t have to be! How can you tell if ham is cooked? The good news is, you can rely on your senses. A fully cooked ham isn’t just about taste—it’s about safety too.
Look for simple clues like the color, texture, and even the juices. These signs help you confirm if you’ve got a fully cooked ham ready to serve. Trust me, once you know what to look for, it becomes second nature. Let’s make sure your ham is both safe and delicious. 🍖
Visual Cues to Tell if Ham is Cooked
Checking the color of the ham
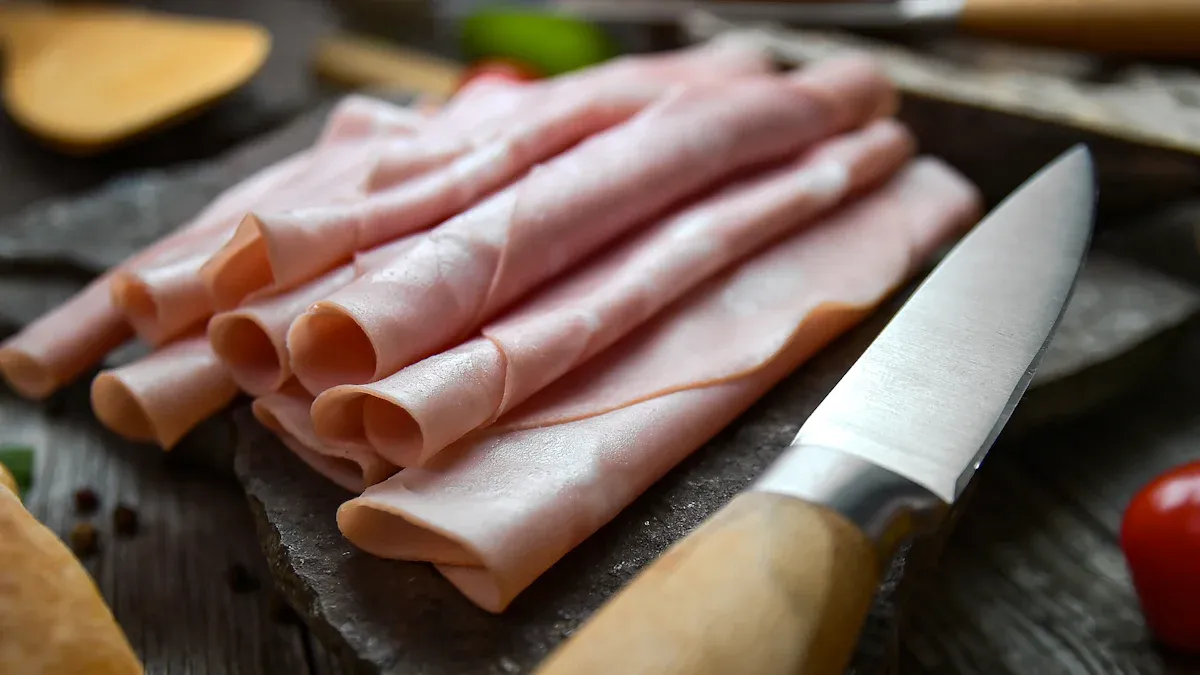
The color of the ham is one of the easiest ways to tell if it’s cooked. A fully cooked ham should have a uniform pinkish hue throughout. If you’re working with a smoked ham, it might have a slightly deeper shade of pink. Raw or undercooked ham, on the other hand, often looks pale or grayish.
Here’s a quick tip: 🧐 Look closely at the edges and the center. If the color is consistent and vibrant, you’re likely good to go. But if you spot any dull or uneven patches, it might need more time in the oven.
Observing the texture of the surface
The texture of the ham’s surface can reveal a lot about its doneness. When ham is fully cooked, the surface feels firm and slightly springy to the touch. It shouldn’t be overly soft or mushy.
During cooking, proteins in the ham unfold and form aggregates, which give the meat its firmness. You might also notice a slight sheen or tightness on the surface due to water retention changes. This process, called syneresis, is a reliable indicator that the ham is cooked.
If you’re unsure, gently press the surface with your fingers. A cooked ham should bounce back slightly, while an undercooked one might feel too soft or sticky.
Examining the juices for clarity
Clear juices are a strong sign that your ham is fully cooked. When you cut into the ham, pay attention to the liquid that comes out. If the juices are clear, you’re in the safe zone. Pink or cloudy juices, however, suggest the ham needs more time.
Here’s a handy trick: 🥄 Use a spoon to collect a small amount of juice from the ham. Hold it up to the light. If it’s transparent and free of any pinkish tint, you’re ready to serve.
Tactile Tests for How to Tell if a Ham is Fully Cooked
Pressing the ham to check firmness
Pressing the ham is a simple way to tell if it’s cooked. A fully cooked ham feels firm but not rock-hard when you press it with your fingers. If it’s still soft or squishy, it likely needs more time to cook.
Here’s what I like to do: I press the thickest part of the ham gently with my fingertips. If it feels dense and holds its shape, that’s a great sign. But if it gives too much or feels mushy, I know it’s not ready yet. Just be careful not to press too hard—you don’t want to lose those delicious juices!
Pro Tip: If you’re unsure, compare the ham’s firmness to the fleshy part of your palm below your thumb. A cooked ham should feel similar to that area when your hand is relaxed.
Feeling for springiness or resistance
A fully cooked ham should have a slight springiness when you press it. This bounce-back effect happens because the proteins in the meat have set properly during cooking.
I like to think of it as a little “meat trampoline.” When I press the surface, I expect it to push back slightly. If it feels too stiff or doesn’t spring back at all, it might be overcooked. On the flip side, if it feels too soft and doesn’t resist, it’s probably undercooked.
🛑 Quick Warning: Always let the ham rest for a few minutes after cooking before testing for springiness. This helps the juices redistribute and gives you a more accurate feel.
Using the touch test for heat distribution
The touch test is a great way to check if the heat has reached the center of the ham. I use this method when I don’t have a thermometer handy.
Here’s how I do it: I carefully touch the surface of the ham and then the thicker parts, like the center. A fully cooked ham should feel evenly warm all over. If the center feels cooler than the edges, it’s not done yet.
Safety Note: Always use clean hands or a utensil to avoid burns. If the ham is too hot to touch, use the back of a spoon to test the heat distribution instead.
This method works best for smaller hams or slices. For larger hams, you might need to combine this with other techniques to ensure it’s cooked through.
Cutting and Observing Without Using a Thermometer
Slicing into the ham to check the interior color
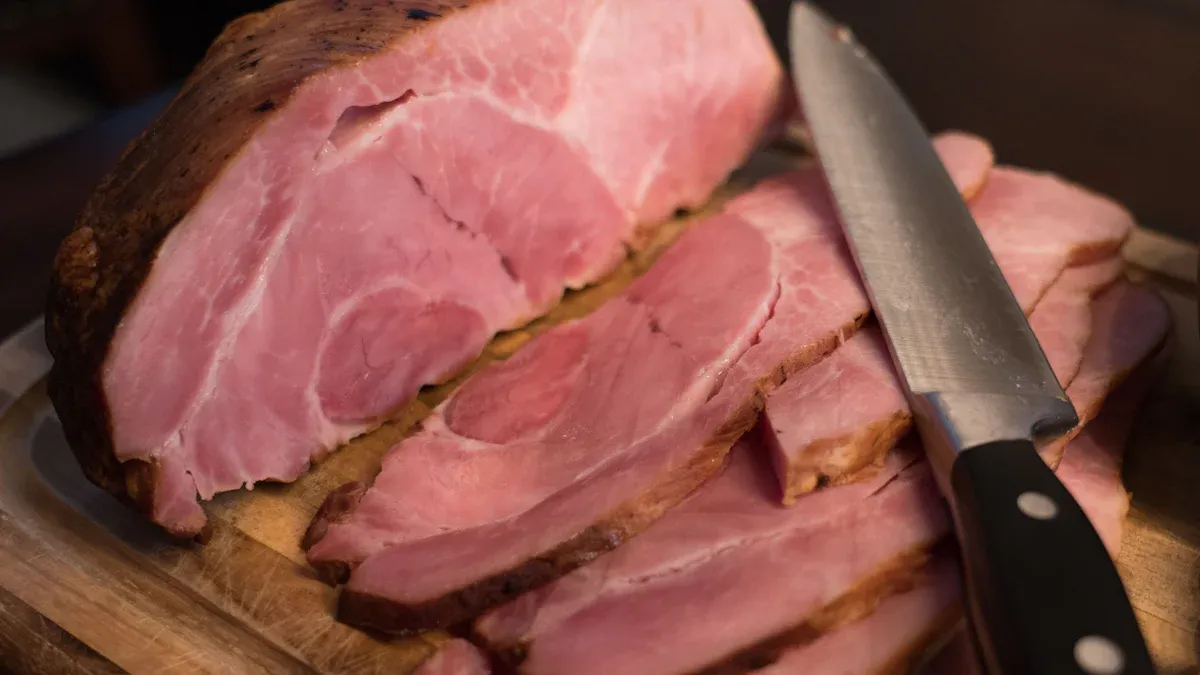
The easiest way to tell if ham is cooked is by slicing into it and checking the color inside. When I cut into a fully cooked ham, I expect to see a consistent pink color throughout. If the center looks pale or grayish, it’s not ready yet.
Here’s what I do: I make a small cut in the thickest part of the ham. This spot takes the longest to cook, so it’s the best place to check. If the color matches the outer layers, I know the ham is done. But if I see any uneven shades, I give it more time to cook.
Quick Tip: Use a sharp knife to make clean cuts. This helps you see the color clearly without tearing the meat.
Looking for signs of raw or undercooked meat
Raw or undercooked ham has a few telltale signs. The texture inside might look mushy or slimy, and the meat could feel sticky when touched.
I always check for these signs when slicing into the ham. If the meat doesn’t look firm and smooth, it’s probably not fully cooked. Another clue is the smell—raw ham can have a faint, unpleasant odor. If I notice anything off, I put the ham back in the oven.
🛑 Warning: Never eat ham that looks raw or smells strange. It’s better to be safe than sorry!
Ensuring the juices inside are clear and not pink
Clear juices are a reliable indicator of a fully cooked ham. When I slice into the ham, I pay close attention to the liquid that comes out. If the juices are pink or cloudy, the ham needs more time to cook.
Here’s a trick I use: I tilt the ham slightly to let the juices pool on the cutting board. Then, I check the color under good lighting. Clear juices mean the ham is safe to eat, while pinkish ones mean it’s still undercooked.
🍴 Pro Tip: If you’re unsure, blot the juices with a paper towel. This makes it easier to see their true color.
Extra Tips to Know if Ham is Cooked
Checking the center with a skewer or knife
Need a fast way to check if it’s done? Push a metal skewer or knife into the thickest part of the ham. Leave it for a few seconds, then take it out carefully. If it feels hot when you touch it, the ham is likely ready. If it’s just warm or cool, it needs more time to cook.
I like this method because it’s quick and easy. It’s especially helpful for bigger hams where the middle takes longer to cook. Be sure to test in several places to check for even cooking.
Pro Tip: Always wash the skewer or knife before and after testing to keep it clean.
Smelling the ham for strange odors
Your nose can help! A cooked ham smells rich and savory. If it smells sour, metallic, or odd, it might be undercooked or spoiled.
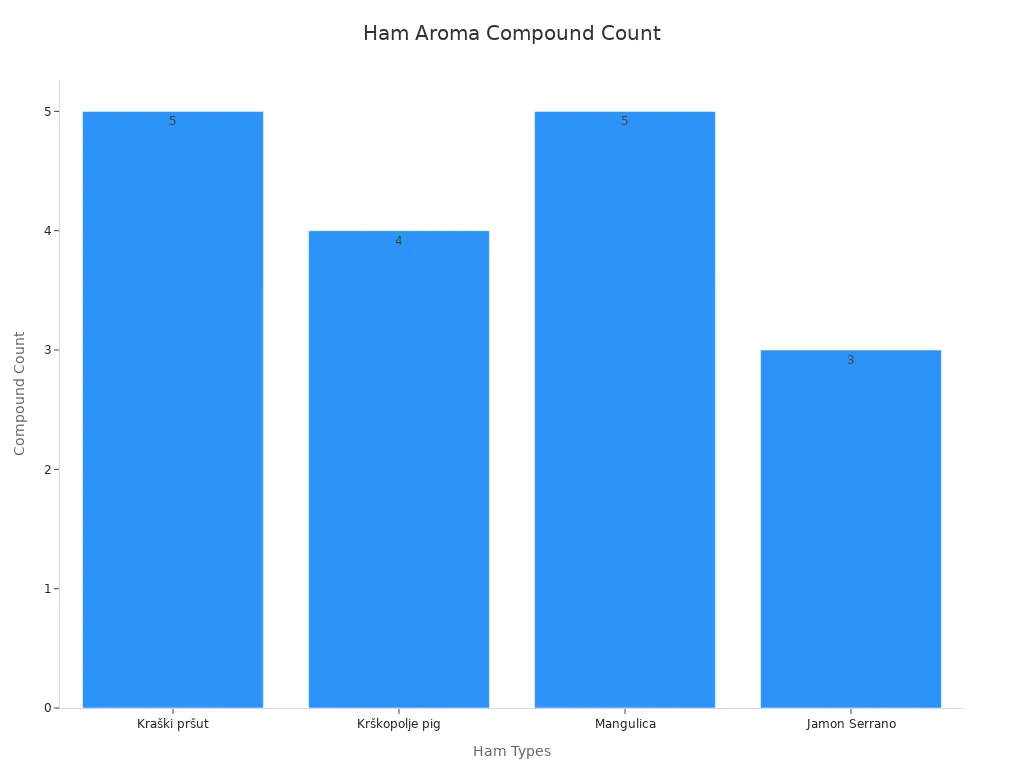
Different hams have their own unique smells. For example, Jamon Serrano smells buttery and nutty, while Mangulica ham has a sweet, earthy scent. Here’s a quick look at aroma compounds in popular hams:
Ham Type | Key Smell Compounds |
|---|---|
Kraški pršut | oleic acid, octanoic acid, 2-decenal (E), 2-nonenal (E), nonanal |
Krškopolje pig | 2-dodecenal (E), n-decanoic acid, benzaldehyde, hexadecanal |
Mangulica | 2,4-decadienal (E,E), palmitoleic acid, 2-undecenal, n-hexadecanoic acid, hexanal |
Jamon Serrano | 9-octadecanoic acid (E), tetradecanoic acid, dodecanoic acid |
🛑 Warning: If the ham smells bad, don’t eat it. It’s safer to throw it away than risk getting sick.
Cooking times and temperatures for common hams
Cooking time matters for perfect ham. Follow these tips to make sure your ham is fully cooked:
Hams should reach 145°F inside and rest for three minutes.
Pre-cooked hams need to be reheated to 140°F.
Proper cooking stops foodborne illnesses like Trichinella spiralis.
Here’s a helpful table for common ham types:
Ham Type | Cooking Temperature (°F) | Cooking Time (minutes per pound) |
|---|---|---|
Pre-Cooked, Bone-In Ham | 140 | 15-18 (whole), 18-24 (half) |
Pre-Cooked, Boneless Ham | 140 | 10-15 |
Pre-Cooked, Spiral-Cut Ham | 140 | 10-18 |
Fresh, Uncooked Ham | 145 | 22-26 (whole leg, bone-in), 24-28 (whole leg, boneless) |
Quick tips:
Heat a pre-cooked, bone-in half ham (5–7 pounds) at 325°F for 18–24 minutes per pound.
For a whole pre-cooked ham (10–14 pounds), heat at 325°F for 15–18 minutes per pound.
A pre-cooked boneless ham (6–12 pounds) needs 10–15 minutes per pound at 325°F.
🍴 Pro Tip: Let the ham rest after cooking. This keeps the juices inside and makes it taste better.
How can you tell if your ham is ready without a thermometer? It’s simple when you know what to look for! I’ve shared four easy methods:
Visual cues like color and clear juices.
Tactile tests for firmness and springiness.
Cutting techniques to check the interior.
Extra tips like using a skewer or relying on smell.
Safety matters most. A fully cooked ham isn’t just delicious—it’s safe to eat. Trust your senses, follow these steps, and you’ll serve a perfect ham every time. 🍖
FAQ
How can I tell if my ham is fully cooked without cutting it?
Check the surface texture and firmness. A cooked ham feels firm and slightly springy when pressed. You can also observe the juices; clear juices mean it’s ready.
What’s the best way to check the center of a ham?
Use a skewer or knife. Insert it into the thickest part, leave it for a few seconds, and test the heat. If it feels hot, the ham is cooked.
Can I rely on smell to know if ham is cooked?
Yes, smell helps! A cooked ham smells savory and rich. If it smells sour or metallic, it might be undercooked or spoiled.
How do I know if the juices are clear?
Tilt the ham slightly. Let the juices pool on a plate or cutting board. Clear juices mean the ham is fully cooked, while pink or cloudy ones suggest it needs more time.
What’s the easiest way to learn how to tell if a ham is fully cooked?
Use visual cues and tactile tests. Look for a consistent pink color, firm texture, and clear juices. These methods are simple and reliable.